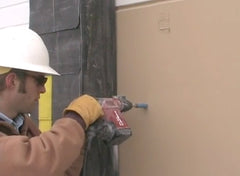
The Finer Points of Choosing Drop-in Anchors and Drop-in Anchor Setting Tools

Drop-in anchors (DIA) and their companion installation tools, called Drop-in Anchor Setting Tools (DIAST), are truly innovations that have endeared themselves to builders and tradespeople globally. The sheer ingenuity of their design, and simplicity of use – of the anchor and the setting tool – gives designers and installers of fixtures on concrete walls, floors and ceiling surfaces greater leeway for creativity. However, the safe and secure use of these two companions does come with a caveat: you need to use the right tool for the right anchor!
In this post, we’ll discuss some of the finer points of drop-in anchors and how to choose the appropriate drop-in anchor setting tools.
A World Before Drop-in Anchors & Drop in Anchor Setting Tools
Before the advent of the drop-in anchor and its associated setting tools in the construction scene, it was common for builders to fasten fixtures and fittings to surfaces using nails, screws, nuts, bolts and other anchoring accessories. However, attaching fixtures to concrete structures, plastered walls, masonry, and ceilings was risky.- First, tradespeople drilled holes into these structures, and used nails or screws to affix the fixtures. Sometimes, the holes were too large or exceptionally small, compromising the strength of the installation.
- Then, even with a right-sized hole, the target material (concrete, plastered wall, masonry, etc.) might have qualities (hardness, smoothness, softness) that prevented the fasteners from holding their grip. This too compromised the reliance of the fixtures.
Long before today’s concrete anchors and concrete anchor setting tools were invented, builder ingenuity prevailed, and engineers and architects developed creative methods to anchor fixtures to concrete and masonry. They embedded wooden beams into concrete and plaster, to use as an anchoring target behind the mortar and brick. Another variation was to drill holes into the target brick or concrete, fill the holes with wooden plugs, and then nail or screw the target object into the plugged holes.
Unfortunately, wood tends to rot over time, especially when installed under porous concrete or cement bricks. And, when exposed to the surface, the wooden plugs become easy prey for insects and termites. Both methods caused anchors to loosen over time, compromising the anchored fixture.
Then, engineers shifted to lead anchors. However, when exposed to high temperatures, lead has the tendency to melt/shrink, resulting in unhinged fixtures. This method also fell out of favor in construction projects due to lead's natural toxicity.
Enter the Drop-in Anchor & Drop-in Anchor Setting Tool
With the introduction of the DIA, and the supporting DIAST, builders and installers have a perfect set of safe and secure tools for all their anchoring applications. The drop-in anchor is a female anchor primarily used for concrete applications. It is dropped into a pre-drilled hole, and the setting tool used to expand the anchor inside the hole. This causes the flanged end of the anchor to expand outward, giving the anchor a firm grip into the surface.
The installation itself is simple:
- Measure the minimum embedment for the anchoring application.
- Acquire drop-in anchors of the requisite specifications, along with the companion drop-in anchor setting tool.
- Drill a hole of the required depth and diameter.
- Clean the hole of debris and dirt (use a blow tube or blow bulb).
- Drop the anchor into the hole and tap it gently.
- Insert the DIAST into the top of the anchor, and hammer until the anchor setting tool is flush with the target surface.
You’re all done!
The holding capacity of the DIA depends on the PSI strength of the concrete surface, and the amendment depth of the anchor. Most drop-in anchors have smooth outer sides. This provides more surface area for the anchor to come into contact with the target area and enables the setting tool to achieve better traction when penetrating the anchor through the pre-drilled hole.
When selected correctly, the right DIAST or drop in anchor setting tool expands the anchor inside the hole, producing a claw-like grip on the installation surface. No amount of moisture, rain or liquid leaks will loosen that grip. And, because the anchors are made from stainless steel or other hardened (or treated) materials, they are safe from insect attacks.
The Right Setting Tool for the Right Anchor
Drop-in anchors require a corresponding setting tool to install correctly. Like a couple of participants in a dance competition, it is important to choose the right DIAST for the type of DIA chosen for your project. Failure to match DIA with DIAST may result in a less-than-secure anchor.
Installation approaches may differ too, but once you appreciate the finer points of installation, you’re likely to better adapt your style and technique for any given project, surface or DIA/DIAST combination. Here are some of the basics:
- Typically, only use DIA in solid surfaces, such as concrete.
- All drop-in anchors require a setting tool to complete the installation.
- Some installers use steel rods, hammering pins or round-head screwdrivers as DIAST “substitutes”. That’s a huge mistake.
- Unlike the setting tool, which manufacturers uniquely calibrate to drive into its companion DIA and expand the flanges to perfection, the substitutes have the tendency to damage the anchor during installation.
- Alternately, using a “substitute” setting tool, or a tool that’s not compatible with the dimension or construction of the DIA, may result in an insecure installation. Fixtures anchored to such installations risk unraveling/unhinging and causing considerable loss and risk to life – including that of installation crews.
Regardless of what type of installation you intend – be it HVAC ducting, electrical cabling trays, overhead sprinklers or floor-anchored equipment or fixtures. Your choice of the right anchor setting tool guarantees a smooth, secure and long-lasting anchor. Find Set it Fast’s line of drop in anchor setting tools here.
